【从零开始的iOS应用开发之旅 - 03】UITabBarController - UIViewController之间的切换与管理
快捷键 作用 shift + command + o 跳转至已知的类、函数 command + r 编译运行
前情提要
前面我们提到UIViewController可以对UIView进行数据的展示(给UILabel设置展示的文本、给UIView设置背景颜色等等),我们任何一个页面都可以在上面添加UIView来实现我们需要的展示效果。
UIViewController的页面切换简单理解
同时,UIViewController也能在多个UIViewController之间进行切换。怎么理解呢?以iOS系统自带的健康应用举例
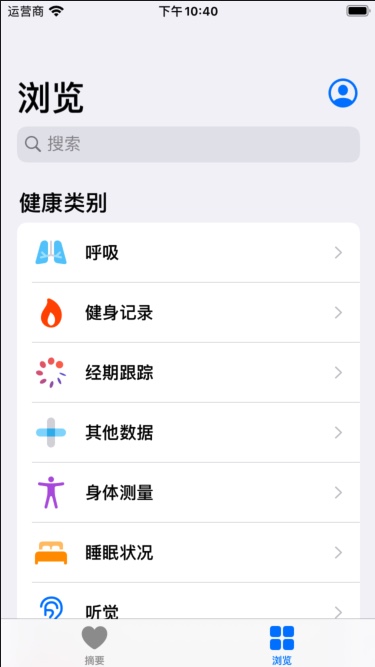
我们可以看到,应用界面存在2个标签页,摘要和浏览。我们可以理解为,整个应用程序下是一个标签页的UIViewController,管理着摘要UIViewController和浏览ViewController。当我们点击浏览下的类别时,可以看到浏览前进到了具体的统计信息,同理可以得出,浏览UIViewController也管理着下面详细信息的UIViewController。
UITabBarController
既然上面提到了标签页切换的UIViewController,就以这个距离,SDK中已有了这样功能的UIViewController ,其名称为 UITabBarController
截取几张视频内的图片结合我们日常使用App的场景,不难看出
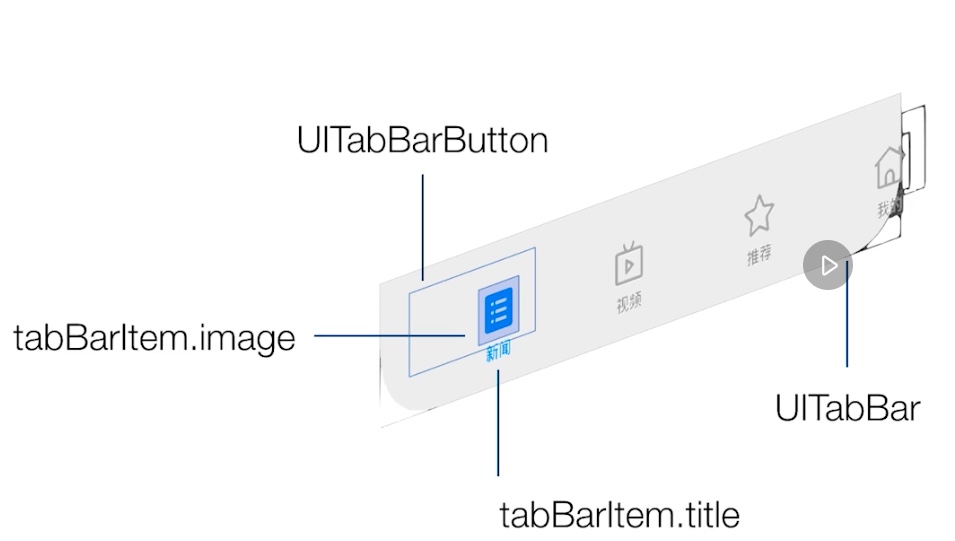

UITabBarController的功能就是管理多个UIViewController的切换,通过点击底部的按钮,展示出对应的页面,一般展示2-5个点页面。
因此UITabBarController会持有供其切换的多个UIViewController,并且还有一个用于展示底部按钮的UITabBar完成展示于交互。
并且UITabbarController按照加入顺序依次展示UIViewController
UITabbarController快速使用!
既然说了些相关概念,下面我们可以动手创建一个UITabbarController来感受下实际的展示效果。
由于在工程创建的时候,我们创建的是iOS的单一页面的工程,因此如果想要使用UITabbarController,还需要做一点修改。
首先我们找到 SceneDelegate.m,在 willConnectToSession 函数中,加入以下代码
    self.window = [[UIWindow alloc] initWithWindowScene: (UIWindowScene *)scene];

    UITabBarController *tabBarController = [[UITabBarController alloc] init];

    UIViewController *controller1 = [[UIViewController alloc] init];
    controller1.view.backgroundColor = [UIColor yellowColor];
    controller1.tabBarItem.title = @"图库";

    UIViewController *controller2 = [[UIViewController alloc] init];
    controller2.view.backgroundColor = [UIColor greenColor];
    controller2.tabBarItem.title = @"壁纸";

    UIViewController *controller3 = [[UIViewController alloc] init];
    controller3.view.backgroundColor = [UIColor cyanColor];
    controller3.tabBarItem.title = @"更多";

    [tabBarController setViewControllers: @[controller1, controller2, controller3]];

    self.window.rootViewController = tabBarController;
    [self.window makeKeyAndVisible];
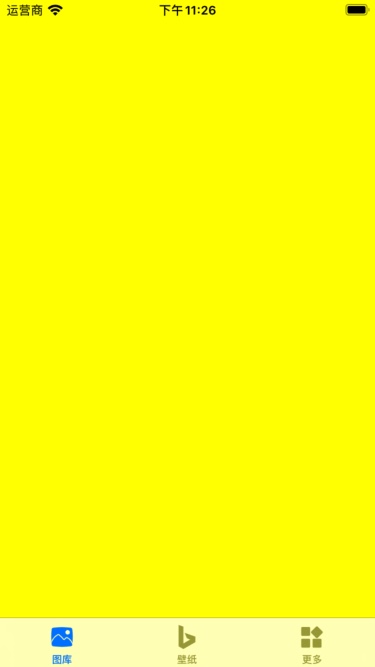
点击运行,可以应用运行了起来
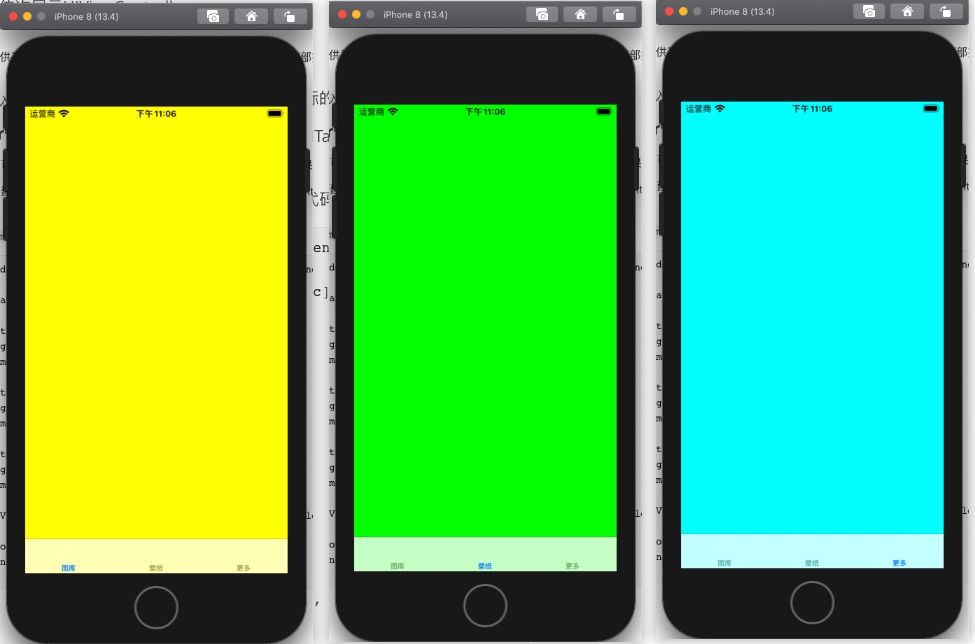
当我们点击下方按钮时,其背景颜色也跟着发生了改变,这说明我们的UITabBarController已经正确的进行了切换
当然我们也注意到,现在底部的tab还没有图标,我们可以在这里为其添加上我们的图标。
为UITabBarViewController的底部按钮添加图标
既然是要添加图标,那么少不了的自然就是图片了,首先先准备对应的图片文件
然后找到 Assets.xcassests 这个文件,单击文件,在打开的窗口中鼠标右击,选择 New Image Set

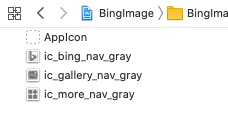
输入图标的名称,然后把对应的图片拖动到右侧对应放大倍数的方框中,添加完成后的列表展示如下
接下来就是把对应的图标设置到 ViewController 中去啦,对应的设置代码为
controller2.tabBarItem.image = [UIImage imageNamed:@"图片名称"];
添加图标完成后,整体函数的代码为
- (void)scene:(UIScene *)scene willConnectToSession:(UISceneSession *)session options:(UISceneConnectionOptions *)connectionOptions {

    self.window = [[UIWindow alloc] initWithWindowScene: (UIWindowScene *)scene];

    UITabBarController *tabBarController = [[UITabBarController alloc] init];

    UIViewController *controller1 = [[UIViewController alloc] init];
    controller1.view.backgroundColor = [UIColor yellowColor];
    controller1.tabBarItem.title = @"图库";
    controller1.tabBarItem.image = [UIImage imageNamed:@"ic_gallery_nav_gray"];

    UIViewController *controller2 = [[UIViewController alloc] init];
    controller2.view.backgroundColor = [UIColor greenColor];
    controller2.tabBarItem.title = @"壁纸";
    controller2.tabBarItem.image = [UIImage imageNamed:@"ic_bing_nav_gray"];

    UIViewController *controller3 = [[UIViewController alloc] init];
    controller3.view.backgroundColor = [UIColor cyanColor];
    controller3.tabBarItem.title = @"更多";
    controller3.tabBarItem.image = [UIImage imageNamed:@"ic_more_nav_gray"];

    [tabBarController setViewControllers: @[controller1, controller2, controller3]];

    self.window.rootViewController = tabBarController;
    [self.window makeKeyAndVisible];

}
编译运行,可以看到,对应的图片已经设置到底部TabBar上面了